จัดวางคอลัมจากบนลงล่างไม่เว้นช่องว่าง
main.dartColumn( mainAxisAlignment: MainAxisAlignment.start, crossAxisAlignment: CrossAxisAlignment.stretch, ... )
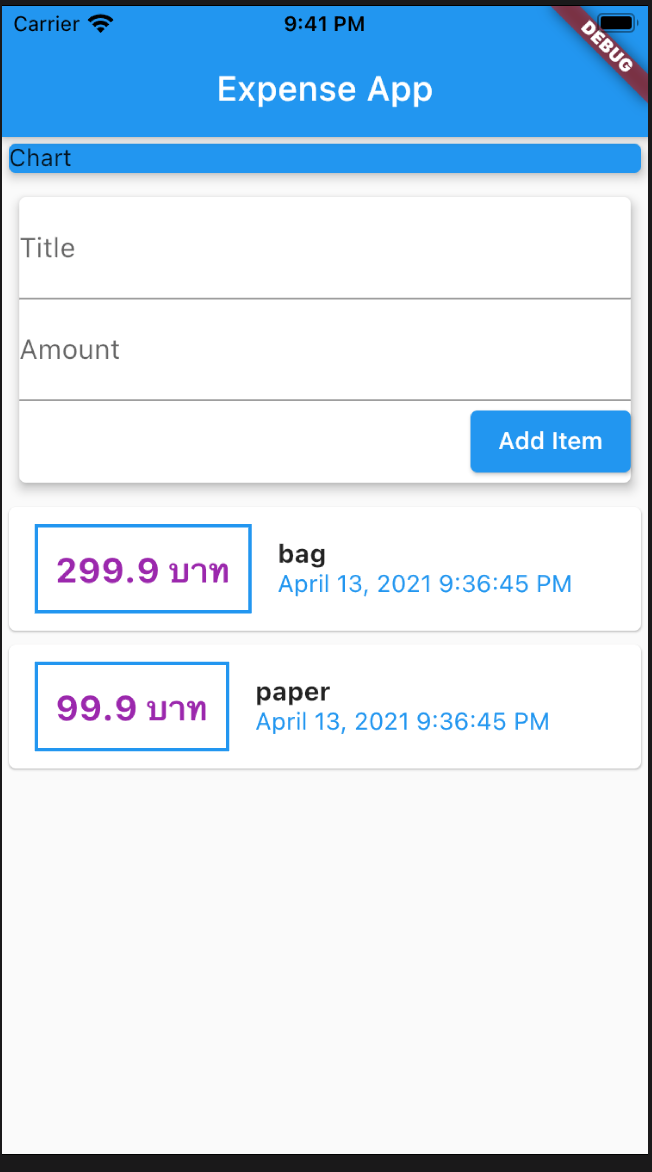
สร้าง TextFild() สำหรับบันทึกรายการค่าใช้จ่าย
จัดวาง TextField() ไว้ระหว่าง Chart กับ Transaction
วาง Card(child:) ต่อจาก Chart Container() เพื่อให้กำหนด margin ได้
เนื่องจากมี TextField() 2 วิดเจ็ต ต้องใช้ Column(children: []) ที่เป็น child ของ Card() มาสร้าง
เพิ่ม TextField() ในลิสต์ของ Column(children:[])
เพิ่มปุ่มกด ElevatedButton() ด้านล่างของ TextField()
main.dart
	Card(
		 elevation: 5,
		 margin: EdgeInsets.all(10),
		 child: Column(
		   crossAxisAlignment: CrossAxisAlignment.end,
		   children: [
			   TextField(
				 decoration: InputDecoration(labelText: 'Title'),
			   ),
			   TextField(
				 decoration: InputDecoration(labelText: 'Amount'),
			   ),
			   ElevatedButton(
				 onPressed: () {},
				 child: Text('Add Item'),
			   ),
			],
		 ),
	   ),
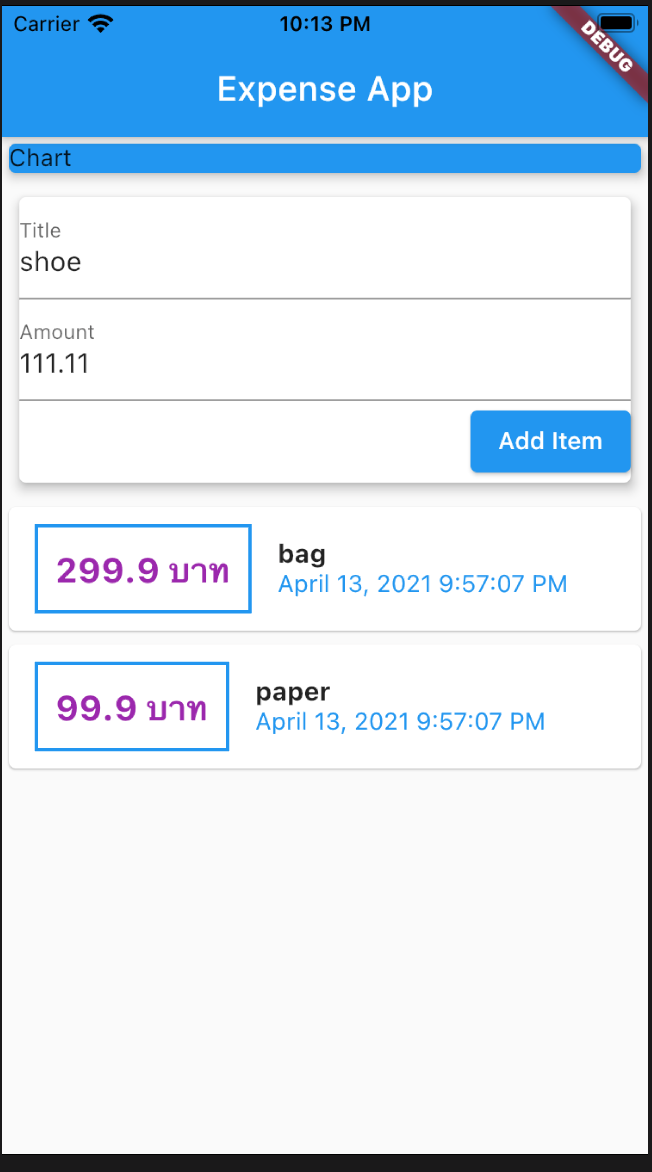
สร้างตัวแปรเก็บค่าอินพุท title และ amount ต่อจาก [Transaction]
main.dartfinal Listtrans = [ ... ] final title = TextEditingController(); final amount = TextEditingController();
เพิ่มพารามิเตอร์ controller ของ TextField(controller:) เพื่อเก็บค่าที่พิมพ์ใน TextField()
กดปุ่ม Add Item จะเห็นข้อมูล title และ amount ใน debug console
เรายังไม่สามารถนำข้อมูลอินพุทไปอัพเดทหน้าจอได้ เพราะหน้าจอยังเป็น StatelessWidget
ต้องเปลี่ยนหน้าจอเป็น StatefullWidget เพื่อทำการอัพเดท Transaction
Card(
     elevation: 5,
     margin: EdgeInsets.all(10),
     child: Column(
       crossAxisAlignment: CrossAxisAlignment.end,
       children: [
           TextField(
             decoration: InputDecoration(labelText: 'Title'),
             controller: title,
           ),
           TextField(
             decoration: InputDecoration(labelText: 'Amount'),
             controller: amount,
           ),
           ElevatedButton(
             onPressed: () {
               print(title.text);
               print(amount.text);
             },
             child: Text('Add Item'),
           ),
         ],
     ),
   ),
หลักการคือแยกวิดเจ็ตที่เปลี่ยนแปลงข้อมูลและต้องอัพเดทหน้าจอเช่น [Transaction] ไปไว้ใน StatefullWidget เพื่อให้เรียกใช้ setState((){}) ได้ ส่วนวิดเจ็ตที่ไม่เปลี่ยนเช่น AppBar ก็ไว้ใน StatelessWidget เหมือนเดิม
วิดเจ็ตใหม่ที่สร้างเพิ่มคือ TransactionList() ในไฟล์ list.dart
UserTransaction() ในไฟล์ user_trans.dart
NewTransaction() ในไฟล์ new_trans.dart
จัดวางไฟล์และโฟลเดอร์ใหม่ดังนี้
สร้างโฟลเดอร์ models
ย้ายไฟล์ trans.dart ไปไว้ในโฟลเดอร์ models
trans.dart
	import 'package:flutter/foundation.dart';

	class Transaction {
	  final String id;
	  final String title;
	  final double amount;
	  final DateTime dt;

	  Transaction(
		  {@required this.id,
		  @required this.title,
		  @required this.amount,
		  @required this.dt});
	}
สร้างโฟลเดอร์ widgets
สร้างไฟล์ list.dart ในโฟลเดอร์ widgets และสร้างวิดเจ็ต TransactionList() เพื่อเก็บและแสดงรายการค่าใช้จ่ายทั้งหมด ซึ่งควรจะเป็น StatefullWidget แต่เนื่องจากเราจะห่อหุ้ม [Transaction] ด้วย UserTransaction() ซึ่งจะเป็น StatefullWidget ให้สร้าง TransactionList() แบบ StatelessWidget โดยให้ย้าย Card() ที่แสดงรายการค่าใช้จ่ายทั้งหมด ใน main.dart มาไว้ใน return ของ build() ของ TransactionList()
list.dart
	import 'package:flutter/material.dart';
	import '../models/trans.dart';
	import 'package:intl/intl.dart';

	class TransactionList extends StatelessWidget {
	  final List transactions;
	  TransactionList(this.transactions);

	  @override
	  Widget build(BuildContext context) {
		return Column(
		  children: transactions.map((tx) {
			return Card(
			  child: Row(
				children: [
				  Container(
					margin: EdgeInsets.symmetric(
					  vertical: 10,
					  horizontal: 15,
					),
					decoration: BoxDecoration(
						border: Border.all(
					  color: Colors.blue,
					  width: 2,
					)),
					padding: EdgeInsets.all(10),
					child: Text(
					  '${tx.amount} บาท',
					  style: TextStyle(
						  fontWeight: FontWeight.bold,
						  fontSize: 20,
						  color: Colors.purple),
					),
				  ),
				  Column(
					crossAxisAlignment: CrossAxisAlignment.start,
					children: [
					  Text(
						tx.title,
						style: TextStyle(
						  fontWeight: FontWeight.bold,
						  fontSize: 15,
						),
					  ),
					  Text(
						//tx.dt.toString(),
						DateFormat().format(tx.dt),
						style: TextStyle(color: Colors.blue),
					  ),
					],
				  ),
				],
			  ),
			);
		  }).toList(),
		);
	  }
	}
สร้างไฟล์ new_trans.dart ในโฟลเดอร์ widgets และสร้างวิดเจ็ต NewTransaction() เพื่อรับอินพุทในการสร้างรายการค่าใช้จ่าย ด้วย TextField() โดยให้ย้าย Card() ที่แสดง TextField() และปุ่มกด ElevatedButton() ใน main.dart มาไว้ใน return ของ build() ของ NewTransaction()
new_trans.dart
	import 'package:flutter/material.dart';

	class NewTransaction extends StatelessWidget {
	  final Function addTrans;
	  final title = TextEditingController();
	  final amount = TextEditingController();

	  NewTransaction(this.addTrans);
	  @override
	  Widget build(BuildContext context) {
		return Card(
		  elevation: 5,
		  margin: EdgeInsets.all(10),
		  child: Column(
			crossAxisAlignment: CrossAxisAlignment.end,
			children: [
			  TextField(
				decoration: InputDecoration(labelText: 'Title'),
				controller: title,
			  ),
			  TextField(
				decoration: InputDecoration(labelText: 'Amount'),
				controller: amount,
			  ),
			  ElevatedButton(
				onPressed: () {
				  print(title.text);
				  print(amount.text);
				  addTrans(title.text,double.parse(amount.text));
				},
				child: Text('Add Item'),
			  ),
			],
		  ),
		);
	  }
	}
<ิ>สร้างไฟล์ user_trans.dart ในโฟลเดอร์ widgets และสร้างวิดเจ็ต UserTransaction() แบบ StatefullWidget เพื่อเรียกใช้ NewTransaction() และ TransactionList() และให้อัพเดทหน้าจอเมื่อมีการสร้างรายการค่าใช้จ่ายอันใหม่
	import 'package:flutter/material.dart';
	import './list.dart';
	import './new_trans.dart';
	import '../models/trans.dart';

	class UserTransaction extends StatefulWidget {
	  @override
	  _UserTransactionState createState() => _UserTransactionState();
	}

	class _UserTransactionState extends State {
	  final List _userTrans = [
		Transaction(
		  id: 't1',
		  title: 'bag',
		  amount: 299.9,
		  dt: DateTime.now(),
		),
		Transaction(
		  id: 't2',
		  title: 'paper',
		  amount: 99.9,
		  dt: DateTime.now(),
		),
	  ];
	  void _addNewTrans(String txTitle, double txAmount) {
		final newTrans = Transaction(
		  id: DateTime.now().toString(),
		  title: txTitle,
		  amount: txAmount,
		  dt: DateTime.now(),
		);
		setState(() {
		  _userTrans.add(newTrans);
		});
	  }

	  @override
	  Widget build(BuildContext context) {
		return Column(children: [
		  NewTransaction(_addNewTrans),
		  TransactionList(_userTrans),
		]);
	  }
	}
เรียกใช้ UserTransaction() ใน main.dart
main.dart
	import 'package:expense/widgets/user_trans.dart';
	import 'package:flutter/material.dart';
	void main() => runApp(MyApp());

	class MyApp extends StatelessWidget {
	  // This widget is the root of your application.
	  @override
	  Widget build(BuildContext context) {
		return MaterialApp(
		  title: 'Expense App',
		  home: MyHomePage(),
		);
	  }
	}

	class MyHomePage extends StatelessWidget {
	  @override
	  Widget build(BuildContext context) {
		return Scaffold(
		  appBar: AppBar(
			title: Text('Expense App'),
		  ),
		  body: Column(
			//mainAxisAlignment: MainAxisAlignment.start,
			crossAxisAlignment: CrossAxisAlignment.stretch,
			children: [
			  Container(
				width: double.infinity,
				child: Card(
				  color: Colors.blue,
				  child: Text('Chart'),
				  elevation: 5,
				),
			  ),
			  UserTransaction()
			],
		  ), // This trailing comma makes auto-formatting nicer for build methods.
		);
	  }
	}
run app, add new item
เมื่อเพิ่มรายการไปเรื่อยๆ จะมีปัญหาในการแสดงผลรายการด้านล่าง ยังเลื่อนดูไม่ได้ และมีข้อผิดพลาดในการแสดงผล ที่ด้านล่างแรเงาสีเหลืองดำ
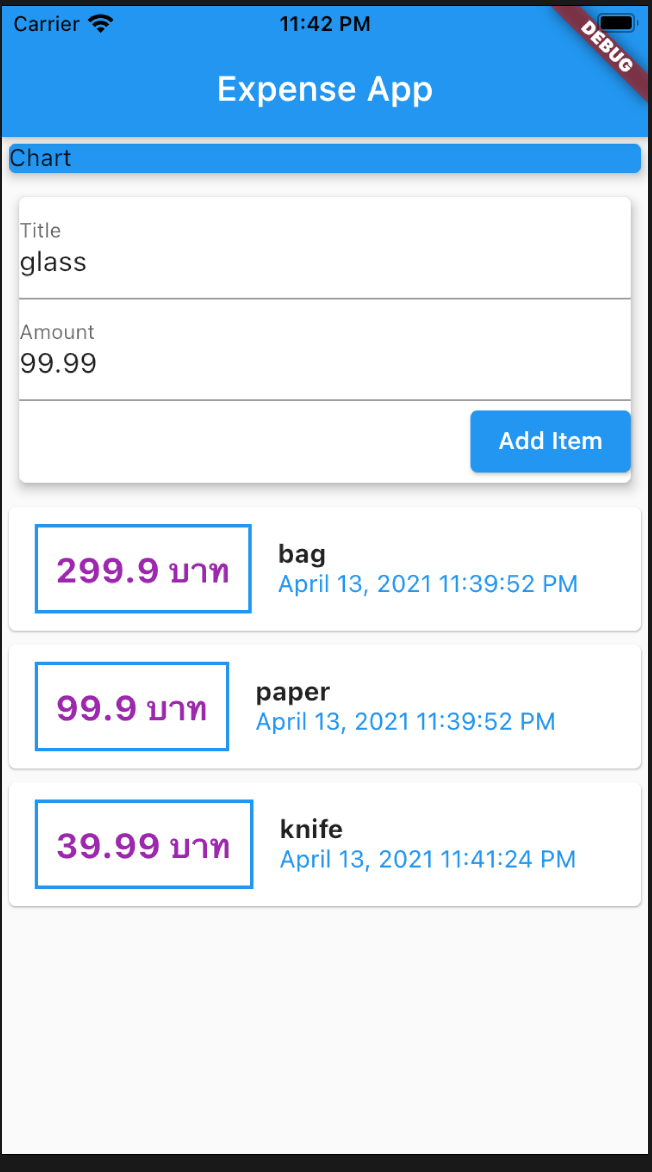
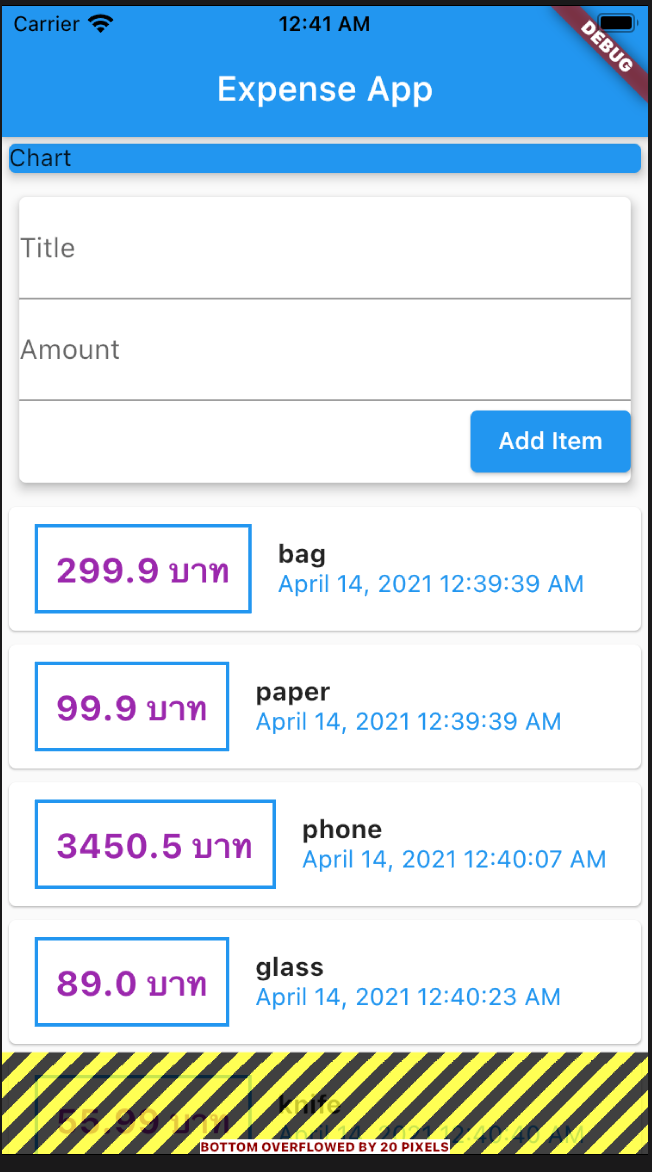
เมื่อเราเพิ่มรายการจนเต็มหน้าจอ ก็จะมีปัญหาในการแสดงผล Column() รายการค่าใช้จ่าย เพราะมันเกินพื้นที่หน้าจอ
วิธีการแก้คือต้องทำให้ Column() สามารถเลื่อไปมาบนหน้าจอได้
ให้ทำการหุ้ม Column() ด้วยวิดเจ็ต SingleChildScrollView() ซึ่งเป็นวิเจ็ตที่เลื่อนหน้าจอขึ้นลงได้
ไปที่ main.dart กดขวาที่ Column() ของ body: Column() แล้วเลือก Refactor... เลือก Wrap with widget... เปลี่ยนชื่อวิดเจ็ตเป็น SingleChildScrollView
	class MyHomePage extends StatelessWidget {
		@override
		Widget build(BuildContext context) {
		  return Scaffold(
			appBar: AppBar(
			  title: Text('Expense App'),
			),
			body: SingleChildScrollView(
			  child: Column(
				//mainAxisAlignment: MainAxisAlignment.start,
				crossAxisAlignment: CrossAxisAlignment.stretch,
				children: [
				  Container(
					width: double.infinity,
					child: Card(
					  color: Colors.blue,
					  child: Text('Chart'),
					  elevation: 5,
					),
				  ),
				  UserTransaction()
				],
			  ),
			), // This trailing comma makes auto-formatting nicer for build methods.
		  );
		}
	  }

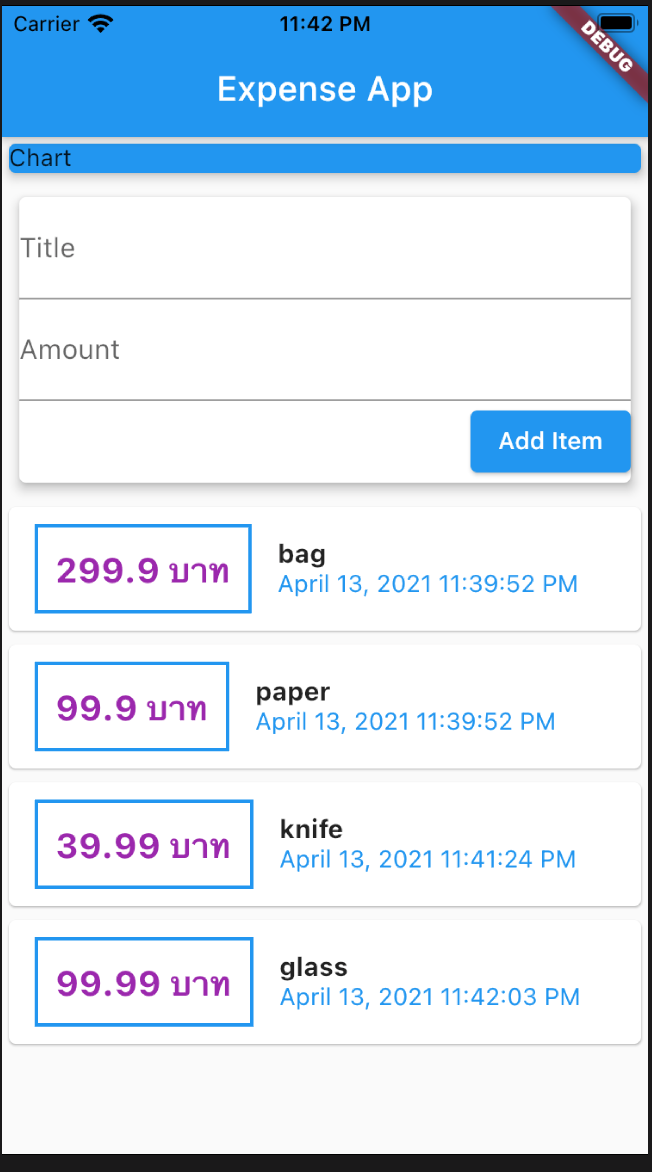
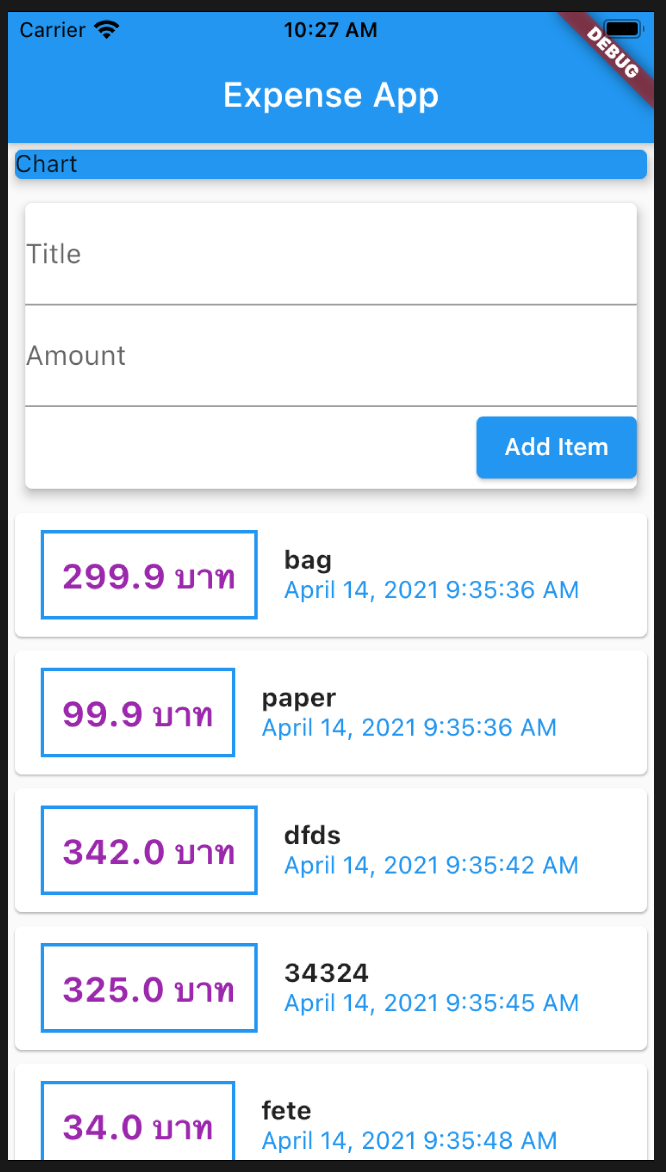
สังเกตว่าการใช้ SingleChildScrollView() ใน main.dart ทำให้เลื่อนหน้าจอขึ้นลงได้ทั้งส่วนที่รับอินพุท NewTransaction() และส่วนที่แสดงรายการ TransactionList() ถ้าเราต้องการให้เลื่อนหน้าจอเฉพาะส่วนที่แสดงรายการ เราต้องใช้ SingleChildScrollView() ใน TransactionList() ด้วย โดยเราตั้งกำหนดความสูงของหน้าจอส่วนที่เลื่อนขึ้นลง
แต่ในคลาส TransactionList() ฟังก์ชัน build() รีเทิน Column() ซึ่งกำหนดความสูงไม่ได้ ก็ให้เราหุ้ม Column() ด้วย Container()
ไปที่ list.dart ในฟังก์ชัน build() ที่ return ให้กดขวาที่ Column() เลือก Refactor... เลือก Wrap with Container
กำหนดความสูงให้กับ Container(height: 400) ตัวเลขความสูงควรปรับให้พอดีกับพื้นที่ใช้งานของ TransactionList()
จากนั้นก็ให้หุ้ม Column() ใน Container() ด้วย SingleChildScrollView()
เพิ่มรายการใหม่หลายๆรายการ กดเลื่อนดูรายการส่วน TransactionList() ขึ้นลงได้ โดยที่ส่วนรับอินพุท NewTransaction() จะอยู่กับที่ ยกเว้นเรากำหนดความสูงของ TransactionList() เกินขนาดหน้าจอเช่น height: 500 หรือเราหมุนหน้าจอในแนวนอน ถ้าพื้นที่หน้าจอหลักไม่เพียงพอสำหรับแสดงรายการหรือแสดงคีย์บอร์ด ฟลัตเตอร์ก็จะเลื่อนส่วนที่รับอินพุทขึ้นไปเพื่อให้แสดงรายการหรือคีย์บอร์ดได้
	import 'package:flutter/material.dart';
	import '../models/trans.dart';
	import 'package:intl/intl.dart';

	class TransactionList extends StatelessWidget {
	  final List transactions;
	  TransactionList(this.transactions);

	  @override
	  Widget build(BuildContext context) {
		return Container(
		  height: 400,
		  child: SingleChildScrollView(
			child: Column(
			  children: transactions.map((tx) {
				return Card(
				  child: Row(
					children: [
					  Container(
						margin: EdgeInsets.symmetric(
						  vertical: 10,
						  horizontal: 15,
						),
						decoration: BoxDecoration(
							border: Border.all(
						  color: Colors.blue,
						  width: 2,
						)),
						padding: EdgeInsets.all(10),
						child: Text(
						  '${tx.amount} บาท',
						  style: TextStyle(
							  fontWeight: FontWeight.bold,
							  fontSize: 20,
							  color: Colors.purple),
						),
					  ),
					  Column(
						crossAxisAlignment: CrossAxisAlignment.start,
						children: [
						  Text(
							tx.title,
							style: TextStyle(
							  fontWeight: FontWeight.bold,
							  fontSize: 15,
							),
						  ),
						  Text(
							//tx.dt.toString(),
							DateFormat().format(tx.dt),
							style: TextStyle(color: Colors.blue),
						  ),
						],
					  ),
					],
				  ),
				);
			  }).toList(),
			),
		  ),
		);
	  }
	}
อีกวิธีที่ดีกว่าในการเลื่อนหน้าจอเฉพาะส่วนที่แสดงรายการ คือการใช้ ListView() ใน TransactionList() แทนที่ SingleChildScrollView() และ Coulumn() โดยเราต้องกำหนดความสูงของหน้าจอส่วนที่เลื่อนขึ้นลงภายใน Container() เช่นเดิม
ในคลาส TransactionList() ฟังก์ชัน build() ให้เอา SingleChildScrollView() ออก และแทนที่ Column() ด้วย ListView()
รันแอป จะได้ผลลัพธ์เหมือนกับการใช้ SingleChildScrollView()
	@override
	Widget build(BuildContext context) {
	  return Container(
		height: 400,
		child: ListView (
		  children: transactions.map((tx) {
			return Card(
			  child: Row(
				children: [
				  Container(
					margin: EdgeInsets.symmetric(
					  vertical: 10,
					  horizontal: 15,
					),
					decoration: BoxDecoration(
						border: Border.all(
					  color: Colors.blue,
					  width: 2,
					)),
					padding: EdgeInsets.all(10),
					child: Text(
					  '${tx.amount} บาท',
					  style: TextStyle(
						  fontWeight: FontWeight.bold,
						  fontSize: 20,
						  color: Colors.purple),
					),
				  ),
				  Column(
					crossAxisAlignment: CrossAxisAlignment.start,
					children: [
					  Text(
						tx.title,
						style: TextStyle(
						  fontWeight: FontWeight.bold,
						  fontSize: 15,
						),
					  ),
					  Text(
						//tx.dt.toString(),
						DateFormat().format(tx.dt),
						style: TextStyle(color: Colors.blue),
					  ),
					],
				  ),
				],
			  ),
			);
		  }).toList(),
		),
	  );
	}

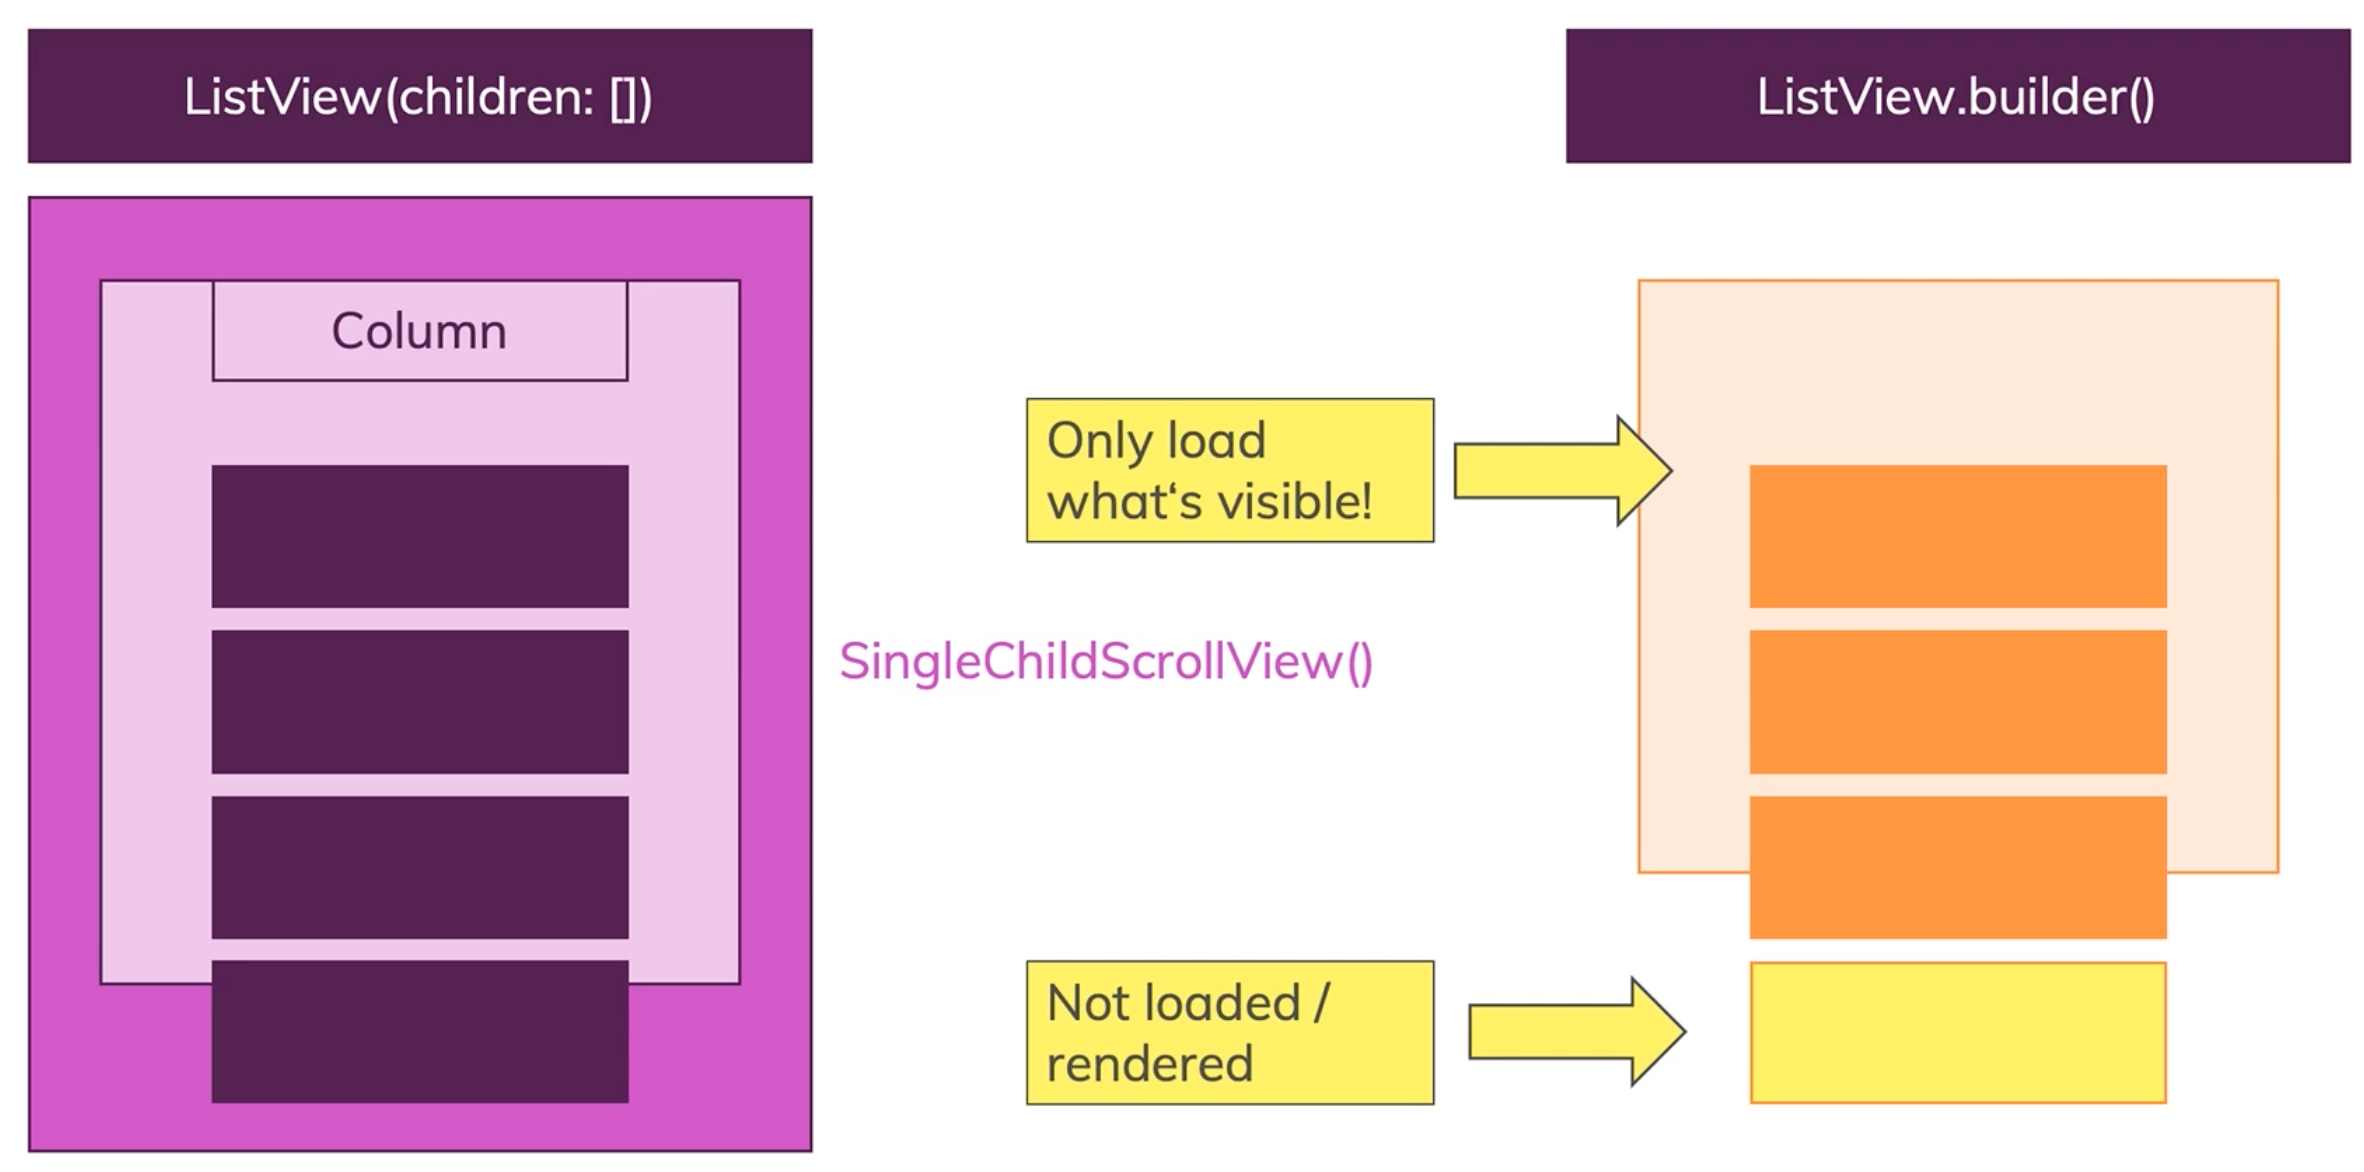
ถ้ามีรายการจำนวนมาก ListlView() จะประมวลผลรายการทั้งหมดไม่ว่ารายการนั้นจะอยู่นอกส่วนที่มองเห็นบนหน้าจอ
ถ้าจะให้ประมวลผลและแสดงผลเฉพาะรายการที่มองเห็นบนหน้าจอเท่านั้น ต้องเปลี่ยนไปใช้ ListlView.builder()
ในคลาส TransactionList() แทนที่ ListlView() ด้วย ListlView.builder()
เพิ่มพารามิเตอร์ของ itemBuilder:(BuildContext, int){} ซึ่งเป็นฟังก์ชันที่มีสองพารามิเตอร์ ใน ListlView.builder()
และต้องเพิ่ม พารามิเตอร์ itemCount: เพื่อบอก ListlView.builder() ว่ามีกี่รายการที่ต้องประมวลผล ซึ่งจำวนรายการก็คือ transactions.length นั่นเอง
เนื่องจาก ListlView.builder() ประมวลผลรายการจากจำนวน itemCount ก็ไม่จำเป็นต้องใช้ map() เพื่อดึงแต่ละรายการออกมา
ในส่วน { } ของ itemBuilder เราต้องรีเทิน Card() ที่แสดงผลแต่ละรายการให้กับ itemBuilder: ของ ListView.builder()
ให้คัดลอก Card() ส่วนที่แสดงผลรายการ มาวางไว้ต่อจาก return ของ (BuildContext, int){ }
แทนที่พารามิเตอร์ tx ของ map() ด้วย transactions[int]
ลบคำสั่งที่เรียกใช้ map() คือ children: transactions.map((tx) ออกไป
	import 'package:flutter/material.dart';
	import '../models/trans.dart';
	import 'package:intl/intl.dart';

	class TransactionList extends StatelessWidget {
	  final List transactions;
	  TransactionList(this.transactions);

	  @override
	  Widget build(BuildContext context) {
		return Container(
		  height: 400,
		  child: ListView.builder(
			itemCount: transactions.length,
			itemBuilder: (context, index) {
			  return Card(
				child: Row(
				  children: [
					Container(
					  margin: EdgeInsets.symmetric(
						vertical: 10,
						horizontal: 15,
					  ),
					  decoration: BoxDecoration(
						  border: Border.all(
						color: Colors.blue,
						width: 2,
					  )),
					  padding: EdgeInsets.all(10),
					  child: Text(
						'${transactions[index].amount} บาท',
						style: TextStyle(
							fontWeight: FontWeight.bold,
							fontSize: 20,
							color: Colors.purple),
					  ),
					),
					Column(
					  crossAxisAlignment: CrossAxisAlignment.start,
					  children: [
						Text(
						  transactions[index].title,
						  style: TextStyle(
							fontWeight: FontWeight.bold,
							fontSize: 15,
						  ),
						),
						Text(
						  //tx.dt.toString(),
						  DateFormat('dd MMM yyyy').format(transactions[index].dt),
						  style: TextStyle(color: Colors.blue),
						),
					  ],
					),
				  ],
				),
			  );
			},
		  ),
		);
	  }
	}
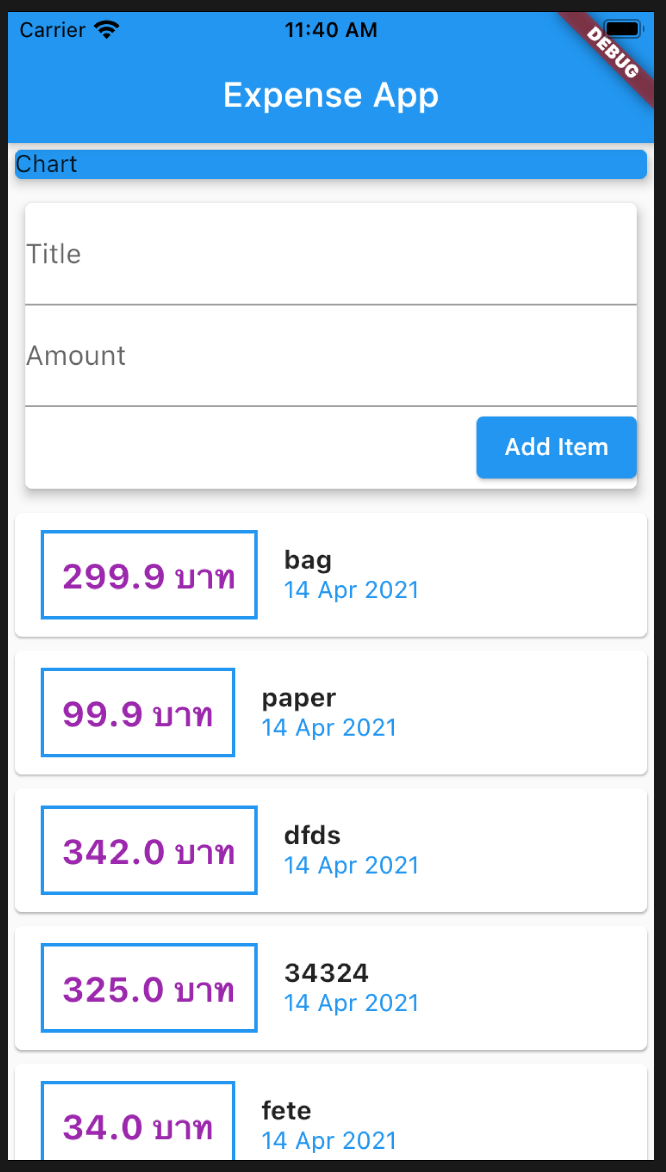
run app ได้ผลลัพธ์เหมือนกัน
2020. mnet50.com